
Mullet Fishing: Catch PhotographyMullet Fishing:
|
|
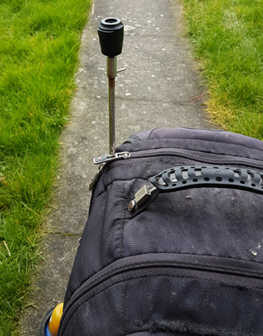
A constant problem is that of trying to take a reasonable photo of oneself, grinning like a hillbilly, and holding a slippery and sometimes lively mullet. Whereas the grinning part can easily be avoided, as many of my online photos will affirm (sorry, Bob), the other bit can be quite tricky. That said, I've seen so many really excellent photos posted by NMC members, I'm guessing that a lot of anglers will already have this 'down', as the 'yoofs' might say. There are a couple of methods that I regularly use, and I'm sure there are several improvements yet to be discovered. My most-used technique was previously to mount a compact camera on a lightweight extendable bank stick; this can either be stuck in the ground, or where there is only a hard surface, it can be kept upright by supporting it with the contents of a backpack. An alternative is a lightweight but robust mini-tripod - again, an extendable one offers better options. A useful addition is a quick release attachment of the type which have a trigger-operated spring grip - possibly one of the Maver brand, which seem to be pretty much useless for any other purpose (sorry, Maver).
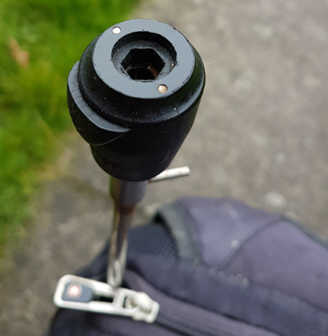
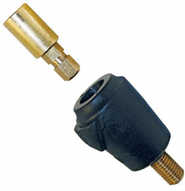
The camera tripod mount can be fitted with a removable threaded pin, which will allow it to be mounted into the quick-release grip. I've tried using a standard bank pole with just the normal screw thread, but unless the mounting pin is a snug fit into the head of the pole, the camera may rotate infuriatingly while you're trying to set it up, with your mullet becoming increasingly impatient to rejoin his chums.
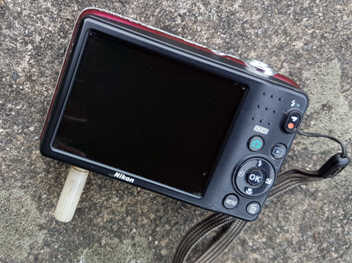
Up front, before there's actually a mullet involved in the proceedings, it's worth considering the focal length of the lens, and also the proximity of the subject to it. On a digital camera, an ideal focal length for a portrait lens is about 70mm. Compact cameras typically have a wide-angle default setting, with zoom capabilities of (say, using the Nikon A10 as an example) 4.6-23.0mm, which represents an angle of view equivalent to that of a 26-130mm lens in 35mm format. Whilst being distinctly 'wide angle', it's nowhere near a fish-eye lens, which for 35mm format cameras is about 8-10mm. However, there are still some problems to avoid - here are some general suggestions:
After all that, just set the timer and 'have at it'.
As an alternative, I more often than not use the cellphone, nowadays, which offers a variety of additional options, depending on what 'app' is used. These currently include:
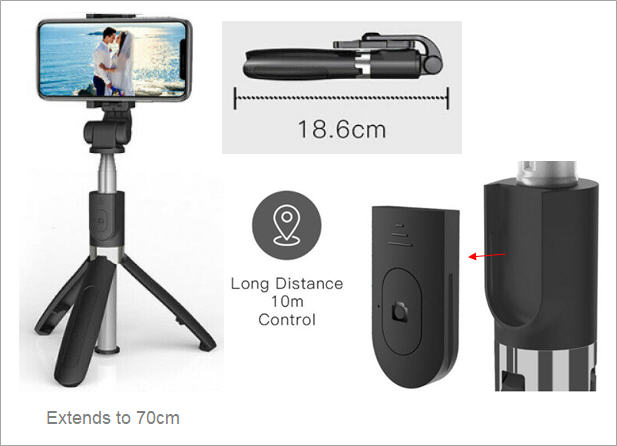
There are a variety of adapters available that will allow the attachment of a cellphone directly to a bankstick, although this isn't the best option on hard surfaces. Instead of the bank stick as a support, a 'selfie stick' trapped upright in the backpack contents can be used, or even a mini-tripod; these are not always terribly stable in windy conditions, or on uneven surfaces, and so may need a bit of assistance - maybe wedge it in something, again. If you are buying the latter, I would recommend obtaining one with a bluetooth remote trigger, if you don't already have one.
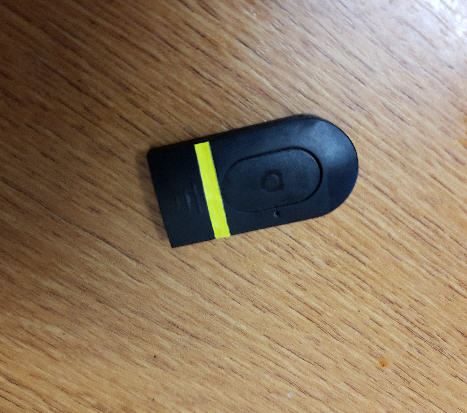
Regarding the remote trigger, it's worth adding a fluorescent highlight on both sides, so that it can be conveniently dropped and later retrieved, especially at night, during the controlled panic of getting things done. Putting it on a lanyard is another option, but that's probably far too sensible... and totally destroys any possibility of finding oneself grovelling about in the pitch dark, looking for the blasted thing... In low light, you may find that the cell phone has far better capabilities than the average compact camera, and a flash-free photo of a more than acceptable quality is usually achievable. Once it's dark, there's no debate - I can't say I've any useful tips regarding night-time flash photographs, other than to use red-eye reduction if available. Now, going back to the 'grinning' part - sadly, I always seem to forget that bit, whilst concentrating on not dropping the fish and doing all of the above without stuffing it up...
|
|
|
Last updated 10.03.26 |
